STARLINE 2500
STARLINE 2500 |

In this scenario, an alien fungus is carried to a colony planet by a meteorite, infecting the 600 human colonists, turning them into flesh-eating zombies.
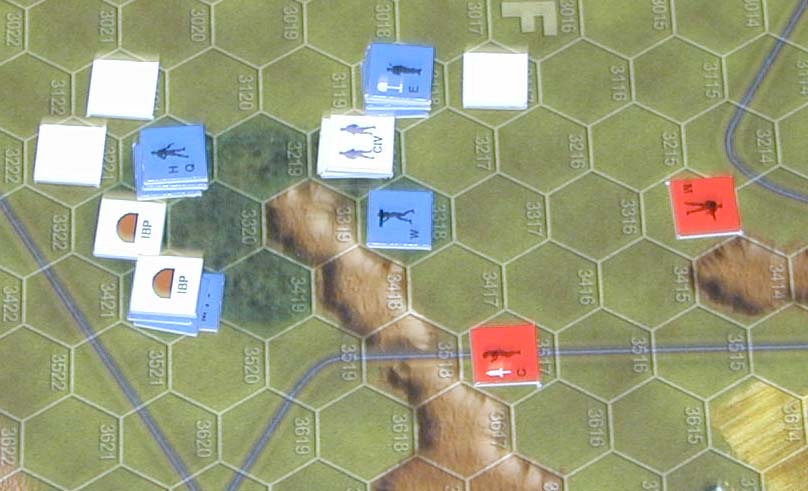
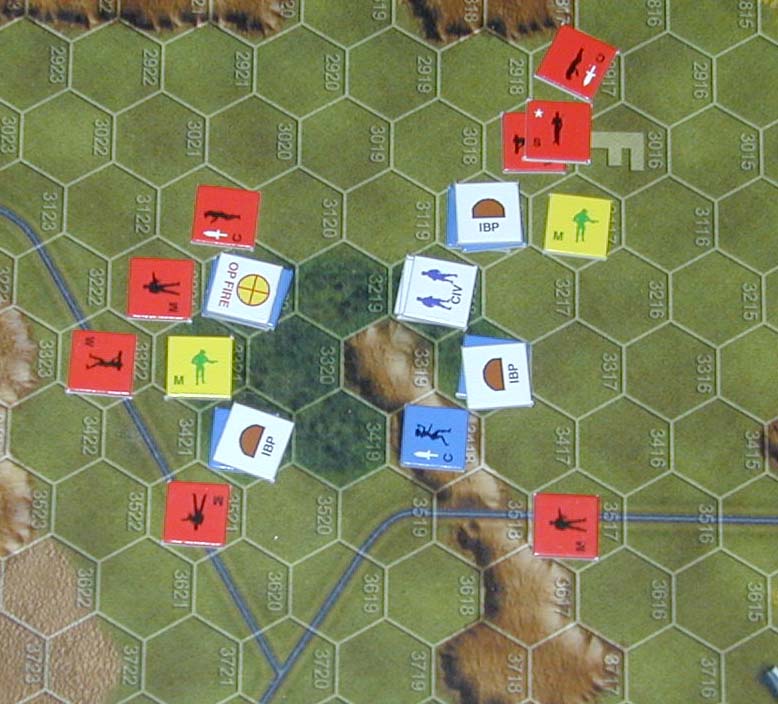
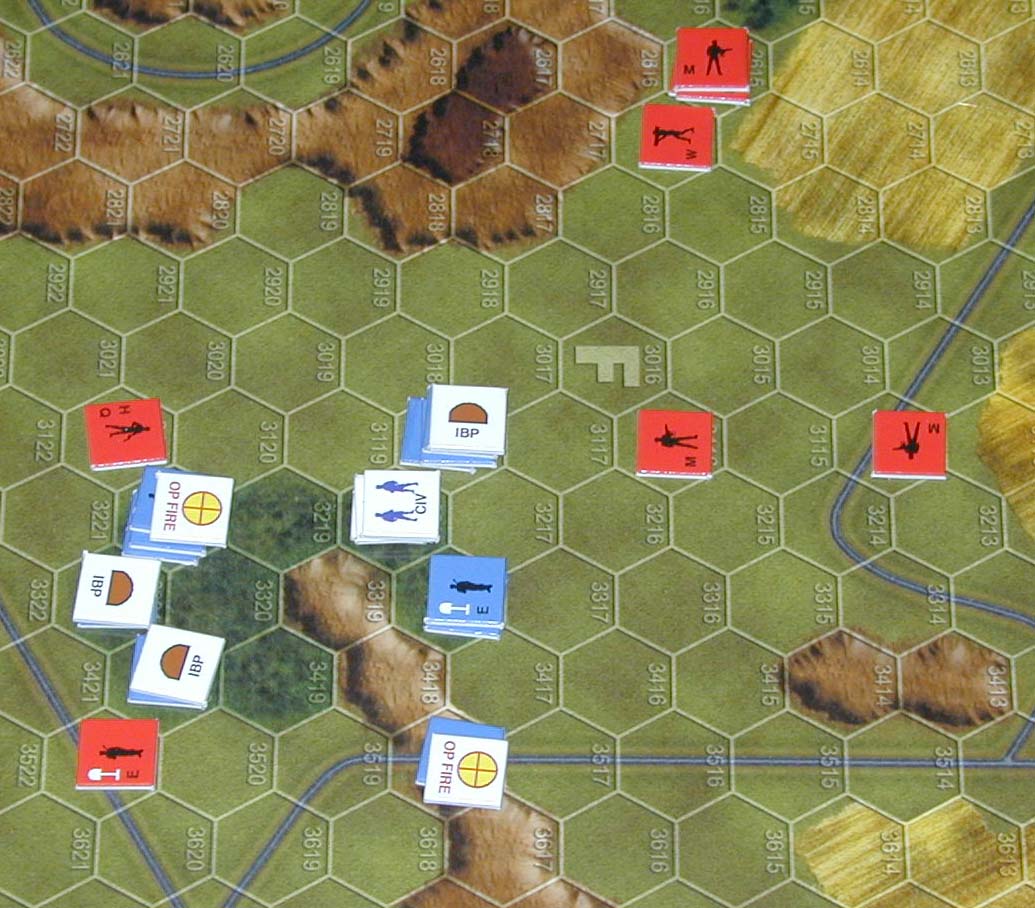
The last survivors (blue counters), including two platoons of Marines (plus a sniper, commando, HQ, engineer, and weapons unit) head into the countryside trying to stay alive until a starship can arrive to rescue them (on Turn #20). With them are about 30 civilians (white counters) who have picked up military weapons and are organized as militia. These survivors are allowed by the scenario rules to set up anywhere on the map not within five hexes of the edge. They cannot leave the map (there are zombies out there). They could set up in small groups but the commander decides to stick together. His plan is to hole up in a patch of woods so that he gets the +2 bonus for covering terrain. His plan also provides for the engineers to move around buliding battle positions in the woods, which bump the bonus up to +3. Since one zombie doing a close assault needs a 1-5 on 2d6, that bonus will help a lot, but three zombies attacking together will kill (zombify) a Marine unit on a 1-7. The commander also picked a spot near the volcano so that at least some of the zombies will blunder into the lava and cease to be a problem.
The rules of the scenario provide for 28 zombie units (red counters) spread out around the edge of the map (one every 5th hex). The rules also add another zombie every turn AND provide that any zombie killed is replaced on the map edge (roll a die for direction). Zombies move toward the nearest living unit at 3 hexes per turn, like a seeking weapon.
Zombie Scenario Rules
SFM LS5 Zombies
Click on an image below for a larger view
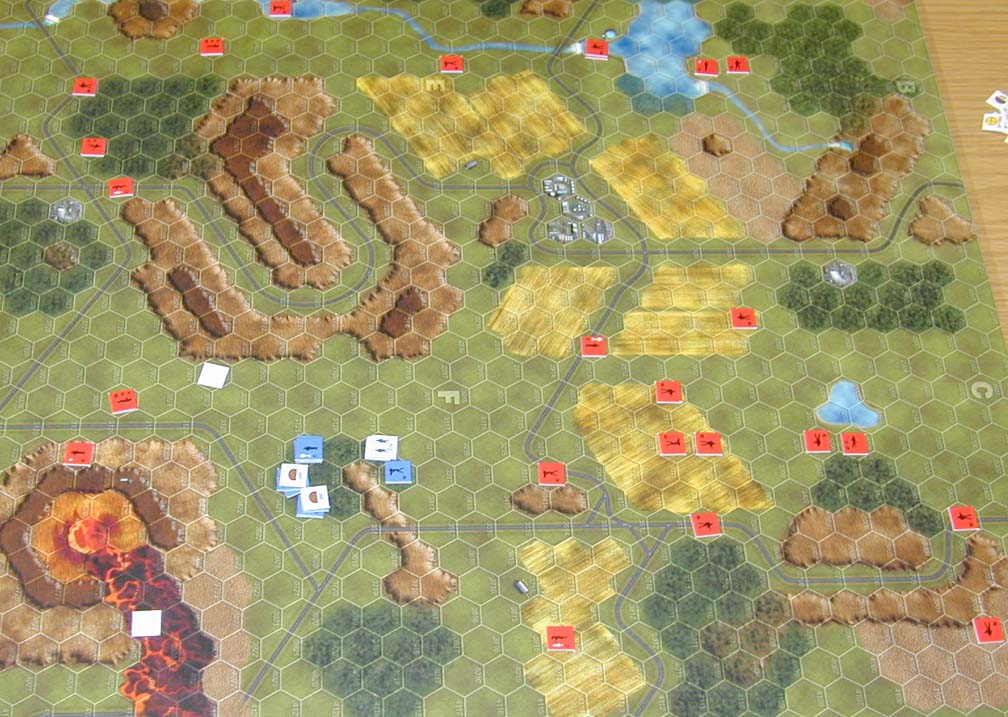 |
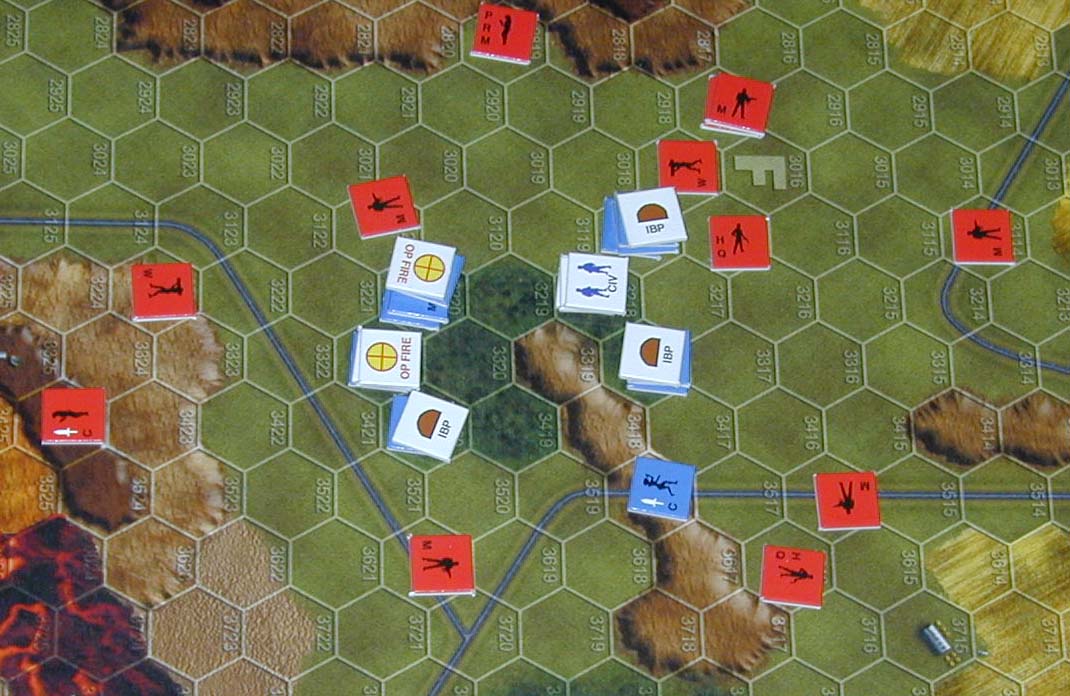
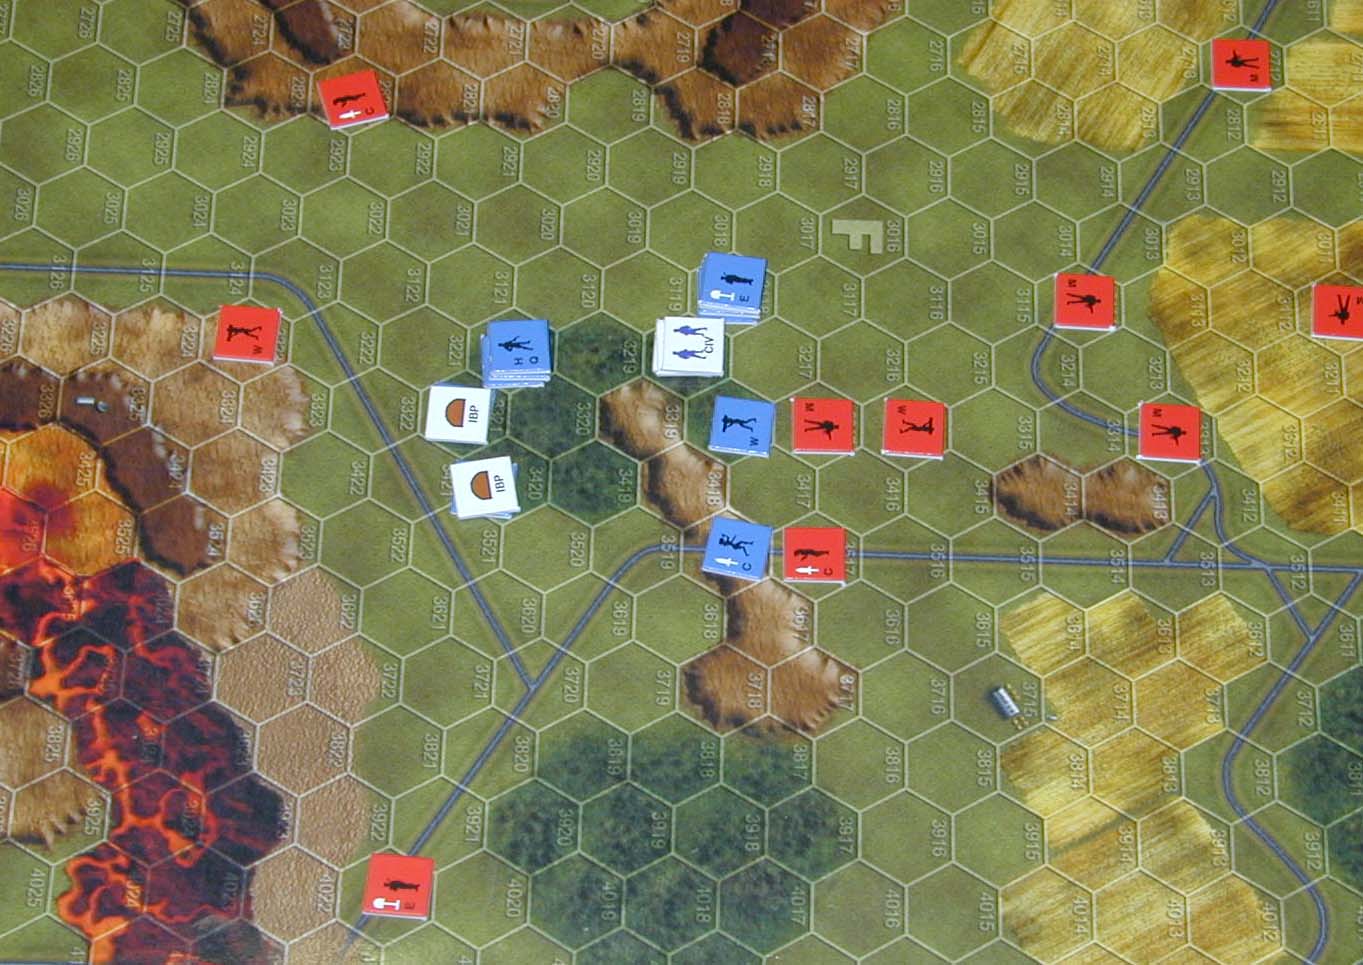
z-1 This first photo shows a developing situation. A few zombies have already been killed (those that started on close map edges) but you can see the approaching hordes from the far edges of the map. |
 |
z-8 More and more zombies appear. Some of them are mass waves from the far side of the map, others are replacement zombies which were placed on the north and south edges. |
 |
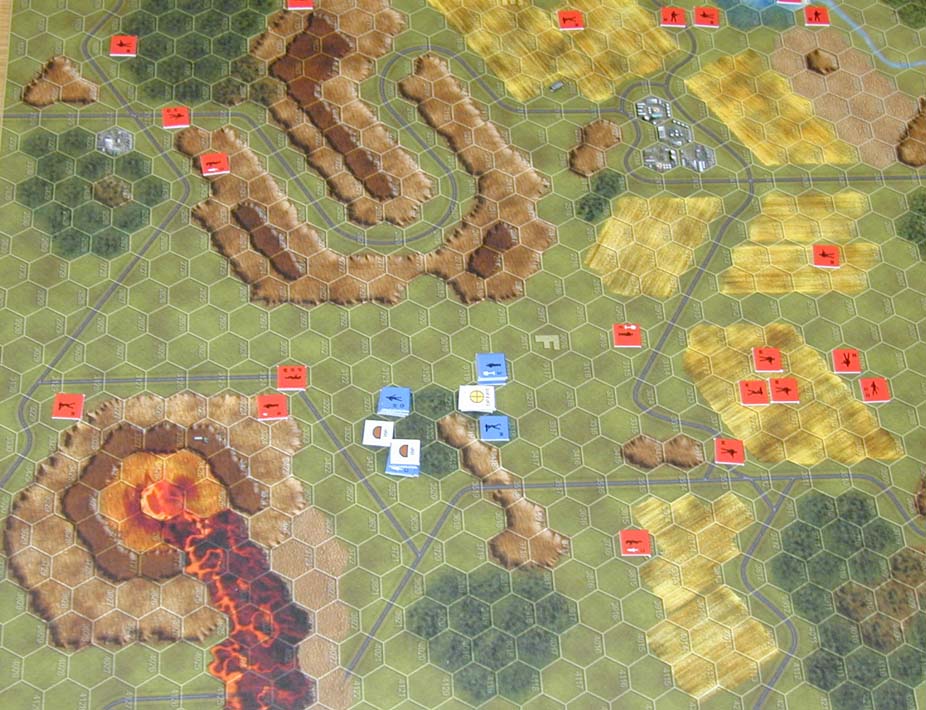
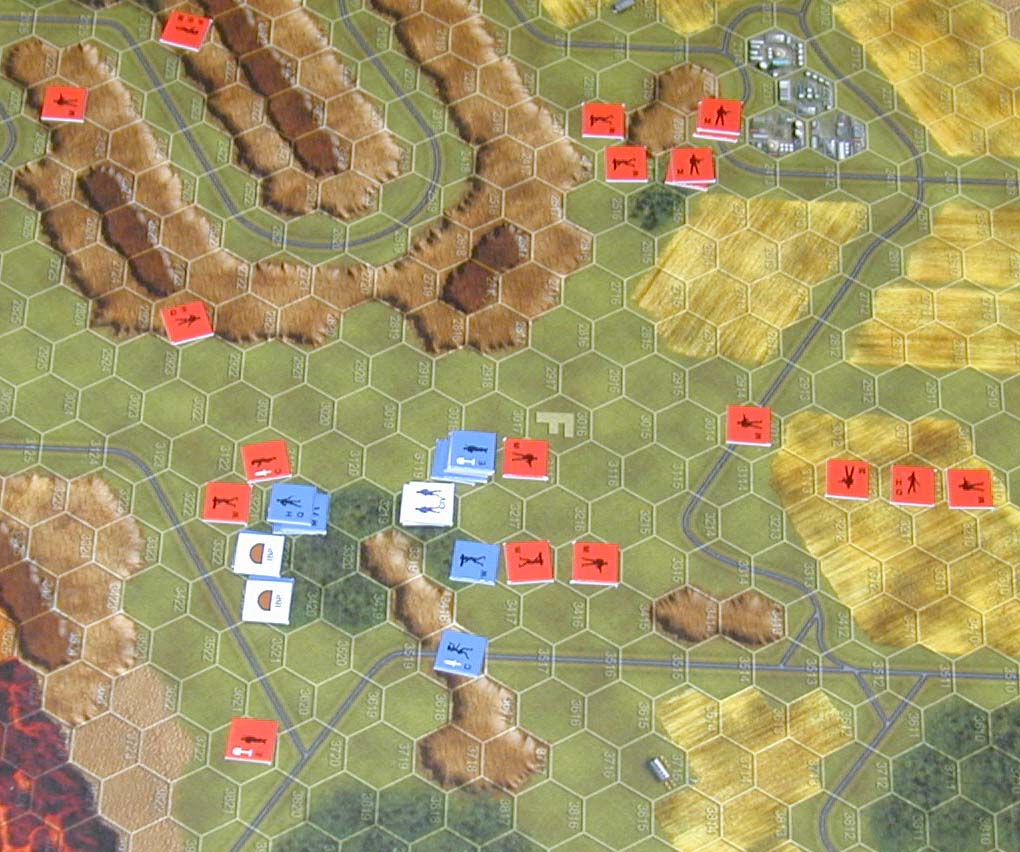
z-15 The defenses collapse as the starship comes into commo range on Turn #17. The Marines scream for help as more and more Marines become zombies. |
 |
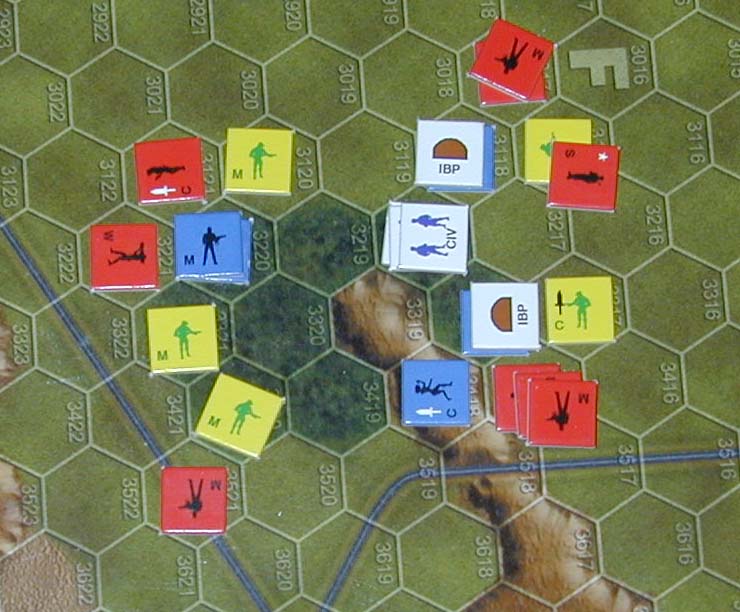
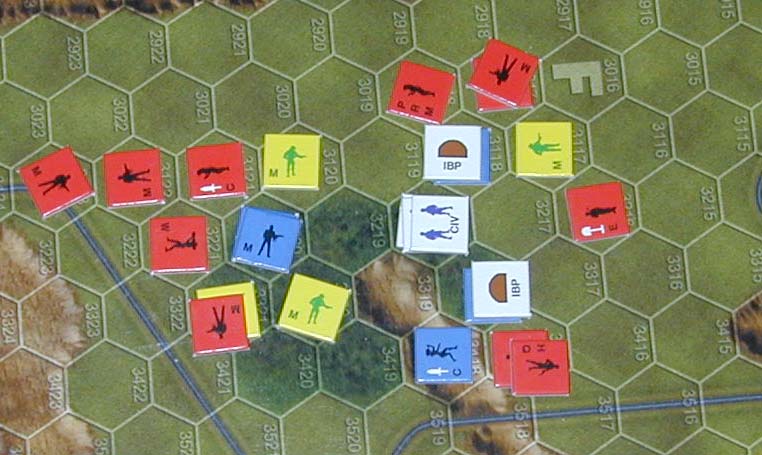
z-2 The original deployment has six Marine squads, the HQ, and the sniper defending the southern (left) end of the woods, leaving only the militia and heavy weapons to cover the north. |
 |
z-9 More and more zombies appear. Some of them are mass waves from the far side of the map, others are replacement zombies which were placed on the north and south edges. |
 |
z-16 The defenses collapse as the starship comes into commo range on Turn #17. The Marines scream for help as more and more Marines become zombies. |
 |
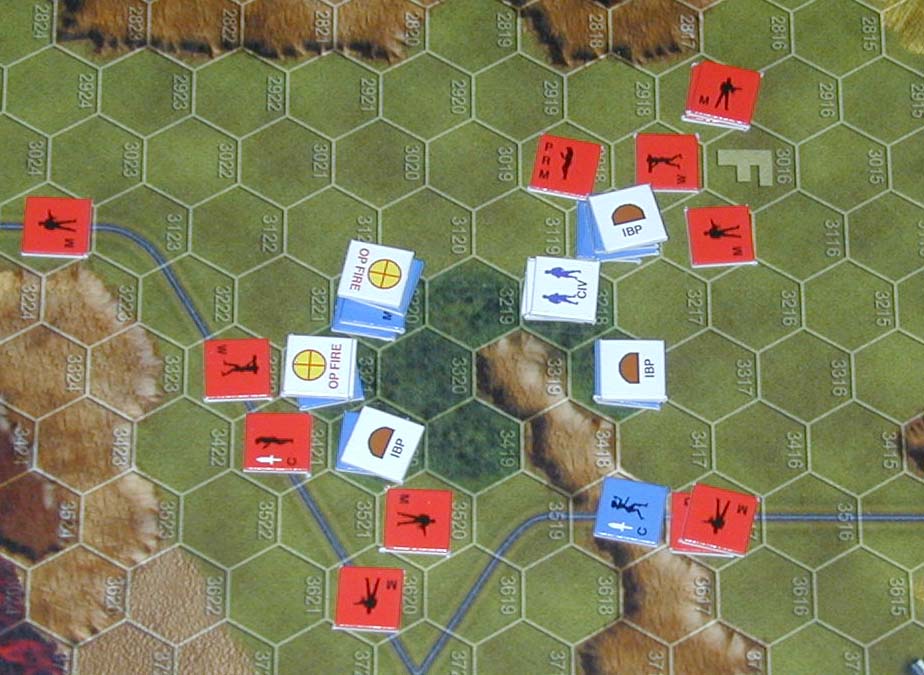
z-3 In these photos, the zombies continue to show up in small numbers, and are cut down by Marine firepower. Even the Militia manage to kill a few. |
 |
z-10 More and more zombies appear. Some of them are mass waves from the far side of the map, others are replacement zombies which were placed on the north and south edges. |
 |
z-17 The defenses collapse as the starship comes into commo range on Turn #17. The Marines scream for help as more and more Marines become zombies. |
 |
z-4 In these photos, the zombies continue to show up in small numbers, and are cut down by Marine firepower. Even the Militia manage to kill a few. |
 |
z-11 More and more zombies appear. Some of them are mass waves from the far side of the map, others are replacement zombies which were placed on the north and south edges. |
 |
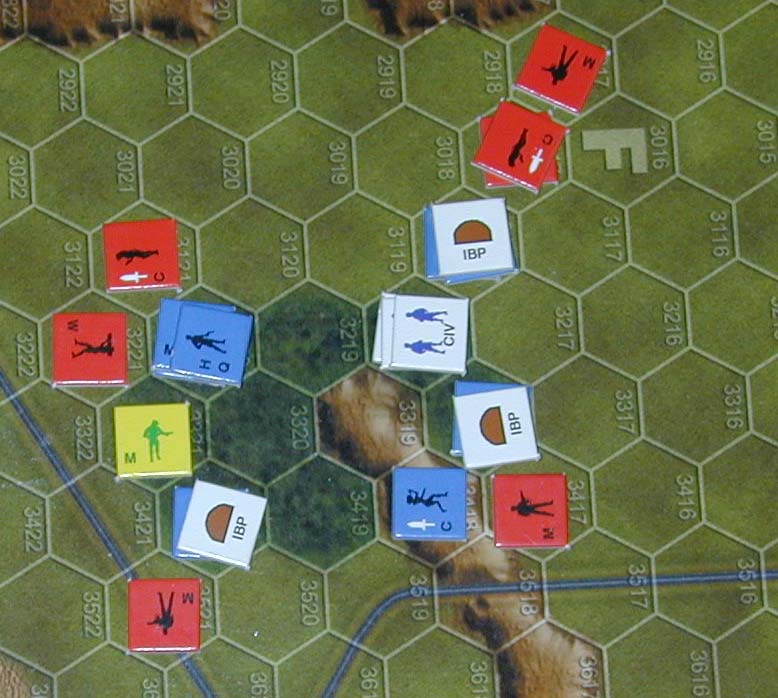
z-18 The battle position is doomed, and the commandoes break out, determined to ... uh... keep alive the records of what happened here. yeah, that's it. They're not running away, they're preserving a legacy. |
 |
z-5 In these photos, the zombies continue to show up in small numbers, and are cut down by Marine firepower. Even the Militia manage to kill a few. |
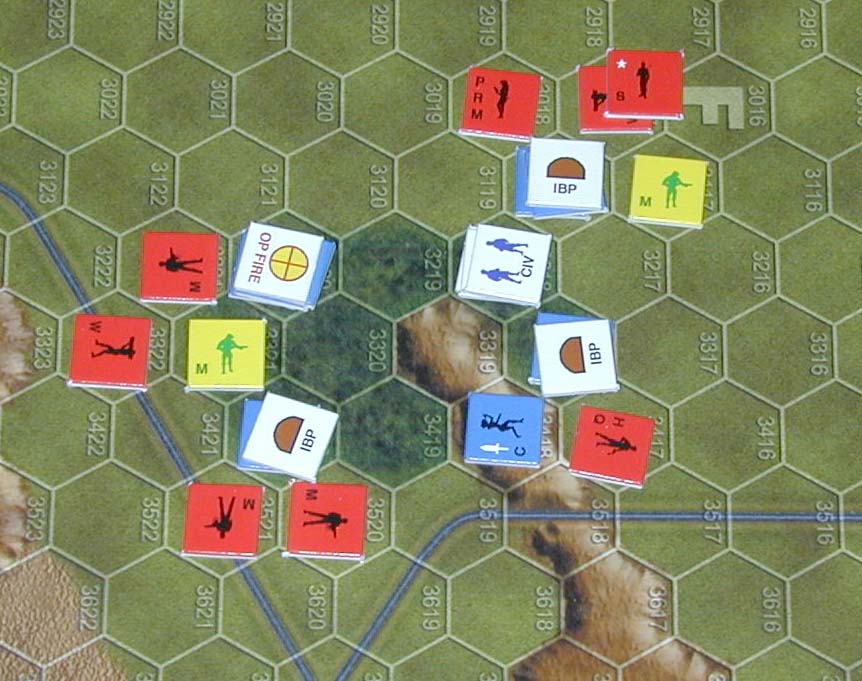 |
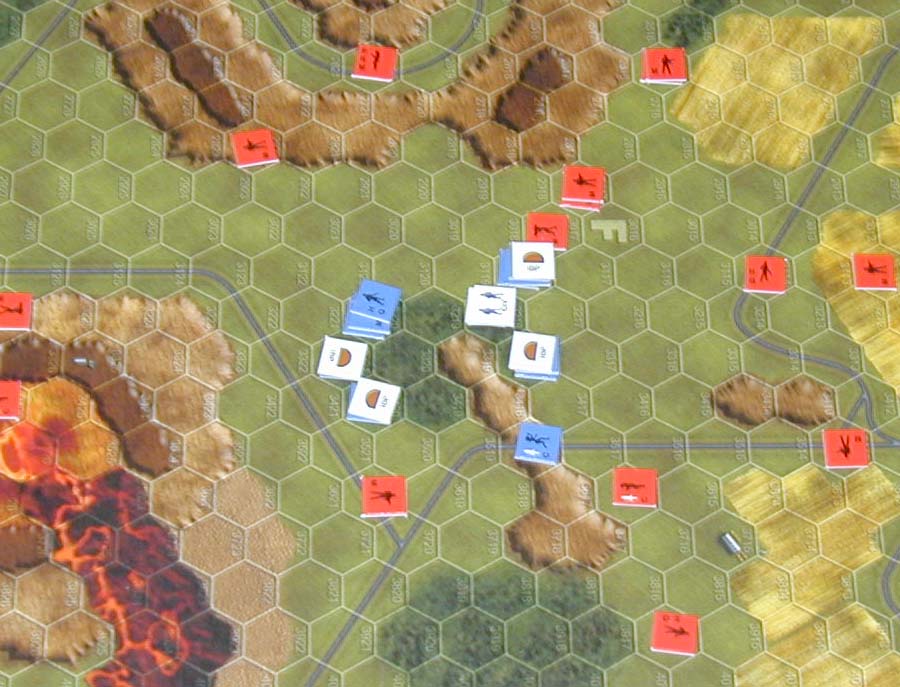
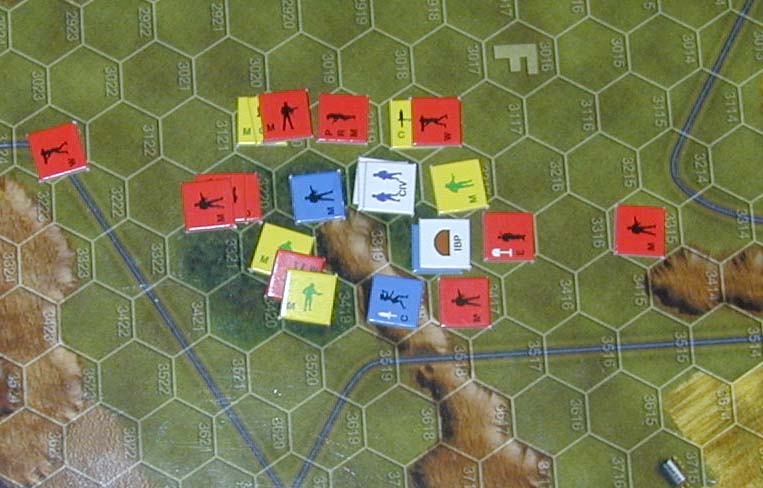
z-12 One turn of bad die rolls and zombies come over the wall! They kill two squads of Marines, which immediately turn into more zombies! (yellow counters). This is a major problem. Not only does it cut Marine firepower, but it increases the number of zombies which are in "contact" with the Marines. |
 |
z-19 Abandoned by the military, the civilians run for the woods. Because woods cost 2 movement points to enter (civilians have 2 movement points, marines 3, commandoes 4) the civilians will be able to keep just barely ahead of the zombies until the starship is in trasnporter range. |
 |
z-6 The Marines start to joke about the "easy" battle, calling it a "zombie shooting gallery", but the large wave of zombies from the far side of the map has come into view. |
 |
z-13 The Marines fight back, killing some zombies (including some former Marines). |
||
 |
z-7 More and more zombies appear. Some of them are mass waves from the far side of the map, others are replacement zombies which were placed on the north and south edges. |
 |
z-14 The Marines fight back, killing some zombies (including some former Marines). |
| Copyright © 1991-2024 Amarillo Design Bureau, All Rights Reserved | Updated 17 August 2011 |